| Red Hat Documentation |
 |
Looking Around with lsNow that you know how to move around, it's time to take a look at what's in the directories. But first, let's make sure you've got something you can look for in your login directory before we go any further. You can start by creating an empty file. To do so, you can use a utility called touch at the shell prompt. Try it; type:
Now, in your login directory, you've got an empty file called foo.bar. You'll see it in a couple minutes. Let's also create a new directory, using the mkdir command. At the prompt, type:
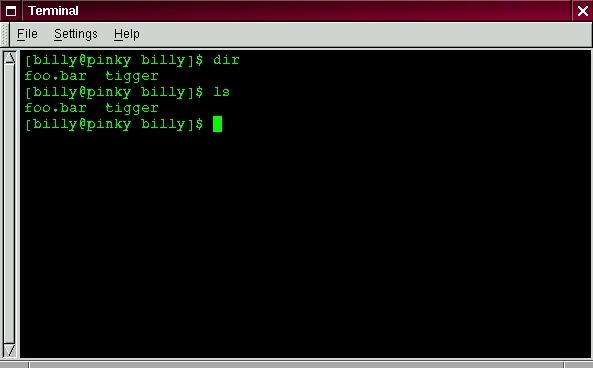
Now, you've created a directory called tigger in your login directory. From root, your new directory's absolute pathname would be /home/yourlogin/tigger, and your directory is the parent of tigger. (You can learn more about creating -- and removing -- files and directories in Chapter 4.) Now, you're ready to go. In the DOS world, using the dir command will display the contents of a directory. The same can be said of Linux -- with some notable exceptions. In Linux, dir won't fully display the contents of directories, and doesn't have the power or flexibility of the list command -- ls. In your login directory, for example, type:
Now, in the same Xterm window, type:
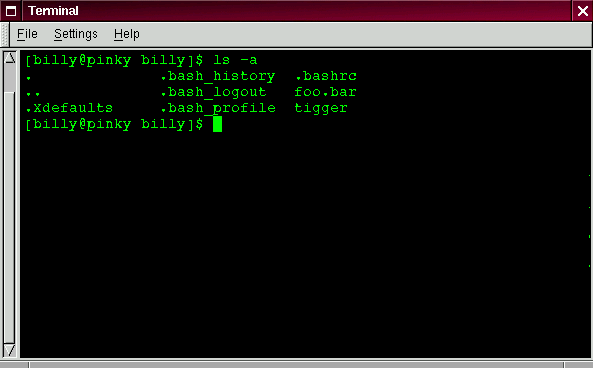
Looks the same (see Figure 3-5). You see, among other contents, your new file, foo.bar and the new directory, tigger. But here the similarities end. Where dir shows you the contents of your directory, it doesn't actually show you everything. Even using the ls command, by itself, won't show you all the files in your directory. To see everything, you've got to call upon an option or two. For example, in the same window that you'd used to type the dir and ls commands, now type:
Quite a difference. When you added the -a option, you were specifying that you wanted to list all the files in the directory (see Figure 3-6). In fact, there are a multitude of options available with the ls command.
Why so many options? Because they can help you sort information according to your needs. For example, you can specify how files are displayed, see their permissions and much more. When you typed ls -a, you probably noticed the files that begin with dots. These are called hidden files or, appropriately enough, dot files. Hidden files are mostly configuration files which set preferences in programs, window managers, shells and more. The reason they're "hidden" is to help prevent any accidental tampering by the user. Besides, when you're searching for something in a directory, you're not often looking for these configuration files, so keeping them hidden helps to avoid some screen clutter.. Whenever a filename starts with a dot (.), it's a hidden file, and ls won't list it. Viewing all the files can give you plenty of detail, but there's more you can uncover, simply by adding more than one option. If we want to see the size of a file or directory, when it was created and more, we can just add the "long" option (-l) to our ls -a command. Try it. Type:
There's quite a bit more detail now. You can see the file creation date, its size, ownership, permissions and more. You don't have to be in the directory whose contents you want to view, either. Let's see what's in the /etc directory by typing:
Here, you'll get plenty of information about the contents of the /etc directory. If you want to add color to your listing, just include the --color option.
To some, adding --color does more than add a splash of color; it gives a clue about the types of files in a directory. For example, directories might all be a royal blue, program files would be green, and so on. If you like what you see, here's how you can display the listing in color all the time. Briefly, we'll be adding one line to the .bashrc file in our login directory. The .bashrc file is used by your shell when you login (an example .bashrc file is shown in Figure 3-7). Now before we go any further... Remember that any changes you make to configuration files can cause you a world of grief if you've made a mistake and you don't have a backup copy of that file. To make a backup copy, make sure you're in your login directory and in an Xterm window, type:
to get to your login directory. Then copy the .bashrc file, keeping it in the same directory, but with a name like .bashrc2.
When you type the above command, what you're saying is, "make a copy of the .bashrc file and name that copy .bashrc2." Now, you have a backup copy of the unmodified .bashrc file in your login directory. If you make a mistake or have trouble, you can replace your .bashrc file by typing:
at the shell prompt. If you need to type this command, you'll be saying, "make a copy of the file .bashrc2 and name that copy .bashrc." The copy command here will overwrite the original .bashrc file -- and you'll still keep a copy of the original (and untouched) .bashrc file with the name of .bashrc2. Now that we're prepared, we'll open .bashrc with Pico, a simplified text editor. (A text editor is a utility program that can create or modify files.) From an Xterm window, type:
You should see something like this:
It's a pretty short file. Those hash marks (#) are comments. Any text after them is ignored by the shell, but they are put there to help guide anyone who's editing or modifying files. Bring your cursor under the line #User specific aliases and functions and type:
So the full file ought to look something like this:
See Figure 3-8 for an example in Pico. Double-check for any typos then, when you're satisfied with the changes, exit by pressing the Ctrl and X keys. You'll see, at the bottom of your editor screen, a message reading:
Press Y for "yes." Now, another message will appear at the bottom:
Simply pressing Enter will save your changes to your .bashrc file. You won't be able to see your changes take effect until you close your Xterm window and open a new Xterm. Once you do that, you'll see your modifications take effect. Here's a short list of some popular options with ls. Remember, you can view the full list by reading the ls man page (man ls).
A little later in this chapter, when we introduce you to pipes and I/O redirection, you'll discover that there are other ways to view the contents of a directory.
|
|