| Red Hat Documentation |
 |
System Configuration with the Control Panel
The control panel is a launching pad for a number of different system administration tools (see Figure 3-26). These tools make your life easier by letting you configure things without remembering configuration file formats and awkward command line options. To start the control-panel, start the X Window System as root with startx and type control-panel in an xterm. You will need to be root to run the control-panel tools successfully. You can do this as well if you already have X running as a normal user. Just type su -c control-panel and then type the root password when prompted. If you plan to do other tasks as root, you could type su followed by the root password when prompted.
After starting the control panel, simply clicking on an icon starts up a tool. Please note that you are not prevented from starting two instances of any tool, but doing so is a very bad idea because you may try to edit the same files in two places and end up overwriting your own changes.
Printer ConfigurationThe printer configuration tool (printtool) maintains the /etc/printcap file, print spool directories, and print filters. The filters allow you to print many different types of files, including:
In other words, simply printing a GIF or RPM file using the lpr command will result in the printer doing "the right thing." In order to create a new print queue, choose Add. Then, select what type of printer is being added. There are four types of print queues which can be configured with printtool:
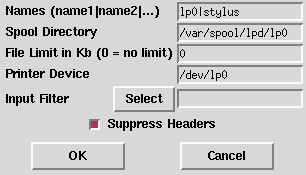
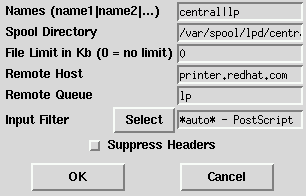
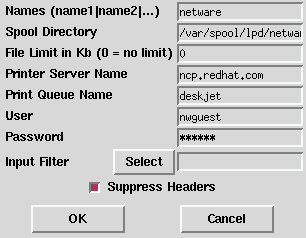
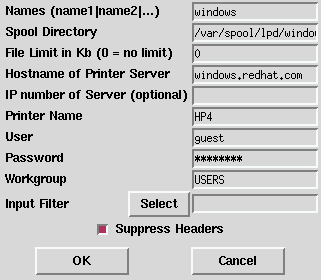
After choosing the printer type, a dialog box requests further information about the print queue (see Figure 3-29). All types of print queues require the following information:
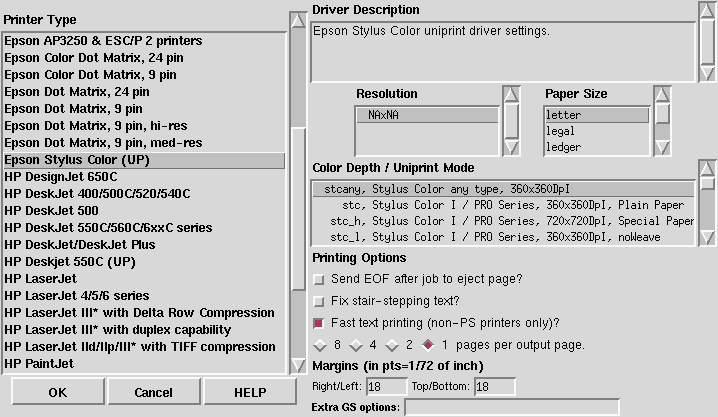
For local printers, the following information is also required:
For remote printers, the dialog box contains additional fields; fill in the following information:
The remote machine must be configured to allow the local machine to print on the desired queue. Typically /etc/hosts.lpd controls this. For SMB and NCP printers, fill in the following information:
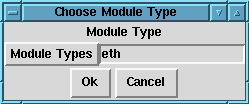
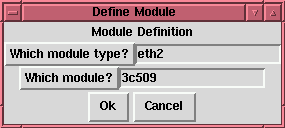
After you have added your print queue, you may need to restart the printer daemon (lpd). To do so, choose Restart lpd from the lpd menu. You may print a test page for any print queue you have configured. Select the type of test page you would like to print from the Tests menu. Kernel Daemon ConfigurationRed Hat Linux includes kerneld, the Kernel Daemon, which automatically loads some software and hardware support into memory as it is needed, and unloads it when it is no longer being used. The tool shown in Figure 3-35 manages the configuration file for kerneld. While kerneld can load some things, such as filesystems, without explicit configuration, it needs to be told what hardware support to load when it is presented with a generic hardware request. For instance, when the kernel wants to load support for ethernet, kerneld needs to know which ethernet card you have, and if your ethernet card requires special configuration, it needs to know about that, too. Changing Module OptionsTo change the options being given to a module when it is loaded, click on the line to select it, then click the Edit button. kernelcfg will bring up a window which looks like Figure 3-36. The options kernelcfg knows about (normally all available options) will each have their own field. Normally, you will want to ignore the Other arguments field. Some modules normally take no arguments; just in case, they have an Arguments field which allows you to enter configuration information. Changing ModulesTo change which module gets invoked to provide a generic service, such as an ethernet card or SCSI host adapter module, you must delete the old one and add a new one. To delete a module, select it by clicking on it, then click on Remove. Then click on Add to add the new module, as explained in the following section. If you have changed your SCSI controller (scsi_hostadapter), remember to make a new initial ramdisk with the /sbin/mkinitrd command as documented in the section called Making an initrd image in Chapter 2. Adding ModulesTo add a module of any type, click on the Add button. You will be presented with a dialog box (Figure 3-37) asking you to choose a module type. Ethernet is eth, Token Ring is tr, SCSI controllers are scsi_hostadapter, and so on. Click Ok to continue to the next dialog box. If there is more than one module which can be used for the module type you have chosen, you will be presented with a dialog box (Figure 3-38) which asks which module you want to use, and may also ask for specifics about the type of module; for ethernet, for example, you need to choose from eth0, eth1, etc. When you are done, click Ok again to continue to specify any module options in the next dialog box (Figure 3-38), which is the same as the dialog for editing a module. Restarting KerneldThe changes that you make with the Kernel Daemon Configuration tool will be made in the /etc/conf.modules file, which kerneld reads whenever it is started. Once you have made changes, you can restart kerneld by clicking on the Restart kerneld button. This will not cause any modules which are currently in use to be reloaded, it will only notify kerneld to use the configuration when it loads more modules in the future. Network Configuration
The network configuration tool (netcfg) shown in Figure 3-39 is designed to allow easy manipulation of parameters such as IP address, gateway address, and network address, as well as name servers and /etc/hosts. Network devices can be added, removed, configured, activated, deactivated and aliased. Ethernet, arcnet, token ring, pocket (ATP), PPP, SLIP, PLIP and loopback devices are supported. PPP/SLIP/PLIP support works well on most hardware, but some hardware setups may exhibit unpredictable behavior. When using the Network Configuration Tool click Save to write your changes to disk, to quit without making any changes select Quit. Managing NamesThe Names panel of the Network Configuration tool serves two primary purposes: setting the hostname and domain of the computer, and determining which name server will be used to look up other hosts on the network. The Network tool is not capable of configuring a machine as a nameserver. To edit a field or add information to a field, simply click on the field with the left mouse button and type the new information. Managing HostsIn the Hosts management panel you have the ability to add, edit, or remove hosts from the /etc/hosts file. Adding or editing an entry involves identical actions. An edit dialog box will appear, simply type the new information and click Done when you are finished. See Figure 3-40 for an example. Adding a Networking InterfaceIf you have added a networking interface to your machine since installing Red Hat Linux, or you didn't configure your ethernet card at install time, you can configure it with a few clicks of a mouse.
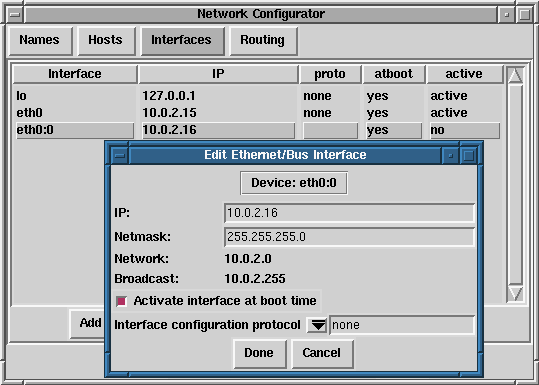
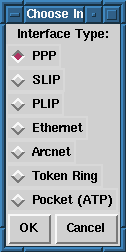
Begin adding an interface by clicking on Interfaces in the main panel. This will bring up a window of configured devices with a row of available options, see Figure 3-41. To add a device, first click the Add button then select the type of interface you want to configure from the box that appears (See Figure 3-42).
PPP InterfaceAdding a PPP interface can be as simple as supplying the phone number, login name and password in the Create PPP Interface dialog shown in Figure 3-43. If you must use PAP authentication for your PPP connection, choose Use PAP authentication. In many cases some degree of customization will be needed to establish a PPP connection. Choosing the Customize button will allow you to make changes to the hardware, communication, and networking settings for the PPP interface. SLIP InterfaceIn order to configure a SLIP interface you must first supply a phone number, login name, and password. This will supply the initial parameters for the chat script needed to establish a SLIP connection. When you choose Done, a dialog titled Edit SLIP Interface appears that enables you to further customize the hardware, communication and networking parameters for your SLIP interface. PLIP InterfaceTo add a PLIP interface to your system you only have to supply the IP address, the remote IP address, and the Netmask. You can also select if you want to activate the interface at boot time. Ethernet, Arcnet, Token Ring and Pocket Adaptor InterfacesIf you are adding an ethernet, arcnet, token ring or pocket adapter to your computer you will need to supply the following information:
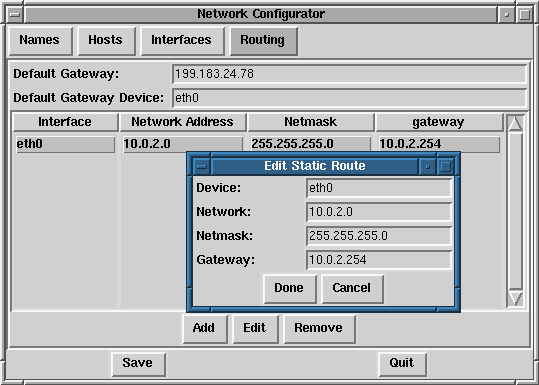
After providing the configuration information for your new device, click Done. The device should appear in your Interfaces list as an inactive device. (The active column should have a label of no.) To activate the new device, first select it with a mouse click and then choose on the Activate button. If it does not come up properly, you may need to reconfigure it by choosing Edit. Managing RoutesIn the Routes management screen you have the ability to add, edit, or remove static networking routes. Adding or editing an entry involves identical actions, just like the Hosts panel. An edit dialog box will appear; simply type the new information and click Done when you are finished. See Figure 3-44 for an example. Time and Date
The time machine allows you to change the time and date by clicking on the appropriate part of the time and date display and clicking on the arrows to change the value. The system clock is not changed until you click on the Set System Clock button. Click on Reset Time to set the time machine time back to that of the system.
|
|
|||||||