| Red Hat Documentation |
 |
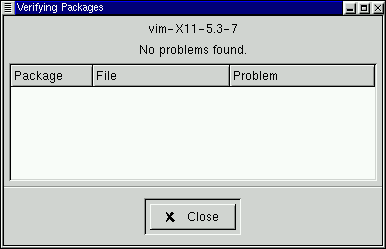
Package ManipulationQuerying PackagesThe easiest way to query packages is to use the Query option from the menu at the top. If you want to query more than one package, make all your selections then press the Query button on the menu. You'll be presented with a window like the one shown in Figure 6-10. The more packages you've queried, the more "tabs" you'll find within the Query box, each tab representing a Query window for a package. The name of the package is centered at the top of the box. Below, the box is divided into two columns of listed information; below this information, you'll see a display area showing package files. In the left column in the information list, you'll find the size of the file, the machine on which the file is found, the name of the package distribution and the group to which its function belongs. In the right column, you'll find the date of the package's installation on your machine, the date the package was built, the name of the vendor and the name of the group who packaged the software. If the package has not been installed on your machine, that space will simply read, "not installed." Clicking on the name following Packager will cause your browser's e-mail application to open in compse, so that you can write to the packager. Centered at the bottom of the information list is the URL of the application's developer (see Figure 6-11). Similar to the e-mail function of the Packager entry, clicking on the URL will cause your browser to open to the corresponding website. Below the description is a list of the files contained in the package. If a D appears in its related column to the left of the path, that file is a documentation file and would be a good thing to read for help on using the application. If a C appears in its respective column, the file is a configuration file. Under the S column, you can view the "state" of the package; here, you'll receive information if any files are reported as "missing" from the package (and therefore probably mean there's a problem with the package). If you're querying a package that's already installed, you'll also find two additional buttons beneath at the bottom of this window: Verify and Uninstall. If you're performing a query on a package that hasn't been installed yet, the buttons on the bottom will be labeled Install, Upgrade and Check Sig. To close the query window without performing any action, left-click on the X at the top right of the window bar. Verifying PackagesVerifying a package checks all of the files in the package to ensure they match the ones present on your system. The checksum, file size, permissions, and owner attributes are all checked against the database. This check can be used when you suspect that one of the program's files has become corrupted for some reason. Choosing the packages to verify is like choosing the packages to query. Select the packages in the display window and use the Verify button on the toolbar or from Packages => Verify on the menu. A window opens like the one in Figure 6-12. As the package is being checked, you'll see the progress in the Verify window. If there are any problems discovered during the verify process, they'll be described in the main display area. Uninstalling PackagesUninstalling a package removes the application and associated files from your machine. When a package is uninstalled, any files it uses that are not needed by other packages on your system are also removed. Changed configuration files are copied to <filename>.rpmsave so you can reuse them later.
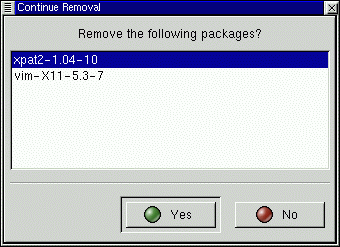
If uninstalling a package would break "dependencies" (which could hobble other applications that require one or more of the removed files in the package), a dialog will pop up, asking you to confirm the deletion. This will occur if you haven't selected the "No dependency checks" box from the Preferences menu (as shown in Figure 6-13). There are a variety of methods through which you can remove a selected package: from the menu, under Packages; from the toolbar and from the Query function. If you decide to remove more than one package at a time, you can choose either an incremental or global selection in the same way as you would when installing, querying or verifying. The total of your selections will be reflected in the status bar on the bottom of the main window. Because you can remove more than one package at a time, use caution to select only those which you wish to remove. Once you've begun the uninstall, Gnome-RPM asks for confirmation, showing a window like the one in Figure 6-14. All of the packages that are about to be uninstalled are listed. You should look at them all to ensure you're not about to remove something you want to keep. Clicking the Yes button will start the uninstallation process. After it completes, the packages and groups that have been removed will disappear from any windows they were in. Upgrading PackagesWhen a new version of a package has been released, it is easy to install it on your system. Select the packages from the window of available packages in the same way you select packages for installation. Both the Upgrade button on the toolbar and, from the menu, under Operations => Upgrade will begin the process. You simply Add packages in the same manner as you would a new package installation. During the upgrade, you'll see a progress indicator like the one for installing packages. When it's finished, any old versions of the packages will be removed, unless you specify otherwise (refer to the section called Configuration for more information). It is much better to use the upgrade option than to uninstall the old versions of a package and then install the new one. Using upgrade ensures that any changes you made to package configuration files are preserved properly, while uninstalling and then reinstalling a new package could cause those changes to be lost. If you run out of disk space during an installation, the install will fail. However, the package which was being installed when the error occurred may leave some files around. To clean up after this error, reinstall the package after you've made more disk space available. |
|