| Red Hat Documentation |
 |
ConfigurationGnome-RPM offers a wide selection of choices for installing and uninstalling packages, documentation and other features. You can customize Gnome-RPM through the Preferences dialog, which you can access from Operations => Preferences on the menu. To make selections in the many of the Preferences dialogs, select the check boxes next to the options. Under the Behavior tab, you'll find a number of options for configuring the way Gnome-RPM installs, uninstalls and upgrades packages. The Behavior tab is split into five sections: Install, Upgrade, Other, Database and Architecture. Note that by default these boxes not checked (see Figure 6-5). Under Install Options, you have the following choices:
Under Upgrade Options, you can select the following:
In Other Options, you can select:
The choices available in Database Options and Architecture Options allow you to decide, among other things, whether you want to perform a "test" installation (which will check for file conflicts without actually performing an install), or whether you want to exclude packages for other operating systems or system architectures. In the Package Listing tab, you'll find a choice of displays for your packages: either View as icons, which will be graphically-based, or View as list, which is not graphical but can provide more information about the packages. In Install Window,, you can specify the path through which Gnome-RPM can find new RPMs on your system. Refer to Figure 6-6 for an example of this dialog. If you're using your Red Hat Linux CD-ROM, this path will probably be
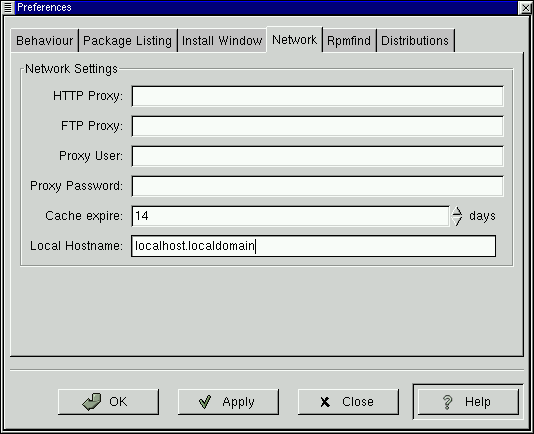
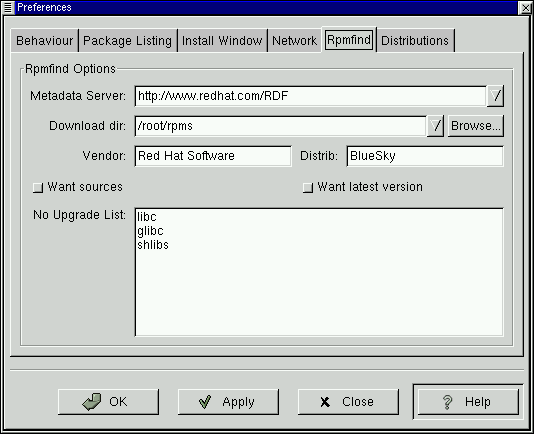
or a similar path which had been set as the default path for Gnome-RPM. If you download new RPMs from the Internet or want to install RPMs via a NFS-mounted CD-ROM this path will be different for you. To change this path, type the full path to the RPMs you'd like to work with. Choosing the Apply or OK buttons will save this path, making it the default path for future sessions. You can also determine the default path by selecting the Browse… button, and visually navigating through the RPMPath window. After changing install path and closing the dialog box, you can use the Install button to view the packages available in your new location. (If the path for your RPMs doesn't match the default path in your preferences, you'll be presented with a browser window, which will allow you to select the correct path for your new RPMs.) Under Package Colors, you'll find color coding for packages. The default setting for older packages is gray; for current packages, the color is green; for newer packages than those installed, the color is blue. These color values can be customized to suit your needs. The RPM Directories, contains a listing of default locations where Gnome-RPM will search for packages. In Network, you have the ability to specify proxies for use with HTTP and FTP transfers, as well as user and password names (see Figure 6-7). Note, however, that the password will not be stored securely. In the Cache expire window, you can set the length of time before data from the rpmfind database is considered out of date. In Rpmfind and Distributions, you'll find settings and options which correspond to the Web find feature. The Rpmfind system was devised by Daniel Veillard, and allows the user to search the Internet for packages by name, summary, architecture and more (see Figure 6-8). The user is then given the option of downloading and installing the most appropriate packages for their system. To learn more about Rpmfind, go to http://rpmfind.net/. The Metadata server sets the server to be used for searches. The Download dir: entry allows you to specify where you want the files to be placed. You can also specify the vendor, distribution name and whether to find sources and/or the latest files. In Distribution Settings, you can set the options for choosing the most appropriate package out of the selections Rpmfind returns, as well as which mirror you would like to use. The higher the rating you indicate for your selection (as shown in Figure 6-9) the higher the priority it will receive; the lower rating, such as "-1," will specify that packages not be recommended. |
|