| Red Hat Documentation |
 |
A Brand New YouWhen you installed Red Hat Linux 6.1, you were given the option of creating a user account, in addition to specifying the root password. Such a handy feature can help you quickly get up and running in your own user account. If you didn't elect to create such an account, it's a pretty simple process. Let's create a user account now. It can be your first user account or an additional user account. Once you're familiar with the process of adding user accounts, you can later edit those user accounts, to specify what the user can and can't have access to. If you're familiar with MS-DOS or, to a lesser extent, Windows 98, you might be a little befuddled by the requirement of creating a user account. After all, if you can navigate the system and use programs in your root account, you might think that having two accounts on a single machine is excessive. Nothing could be further from the truth. Here's why: Linux is a multi-tasking, multi-user system, which means it can safely and securely accommodate many users at one time, performing plenty of tasks each user requires. But only one account can be root -- capable of changing the way the operating system works. Because "rooting around" can easily lead to havoc, it's important to safeguard against accidents. That's why just about every Linux user -- even if they're the system administrator -- has their own user account. Once you're logged in as root, you have two ways to conveniently add a user to the system: from within X and from the shell prompt. Both methods are quick and painless. Let's say that the account you want to choose is called "billy." From X: One of the most powerful tools you can use for system administration is Linuxconf. You can use Linuxconf for adding and manipulating accounts, monitoring system activities and plenty of other system features.
Completely documenting all the features of this utility would take more space than we have here. For a more detailed look at the application's features -- including greater depth on manipulating accounts -- turn to the System Configuration with Linuxconf chapter in the Official Red Hat Linux Reference Guide.
One of the easiest ways to access Linuxconf is from the shell prompt in an Xterm window. At the prompt, type:
We want to add an account, so scroll about a third of the way down the menu in the left panel, to the entry marked Users accounts. If the entry has a "+" next to it, go ahead and click on the "+".
Now, the menu will expand to show entries in the Users accounts listing (as shown below). The subentries will look like the following:
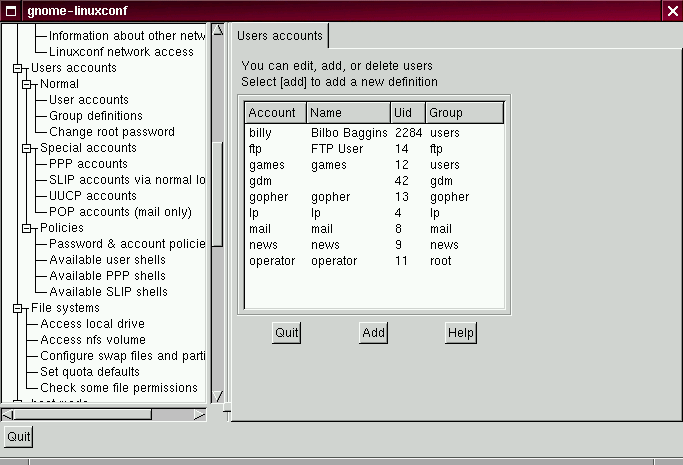
Left-click with your mouse button on the User accounts entry, under Normal. In the right panel, you'll now see a box of the current user accounts (as shown in Figure 2-8).
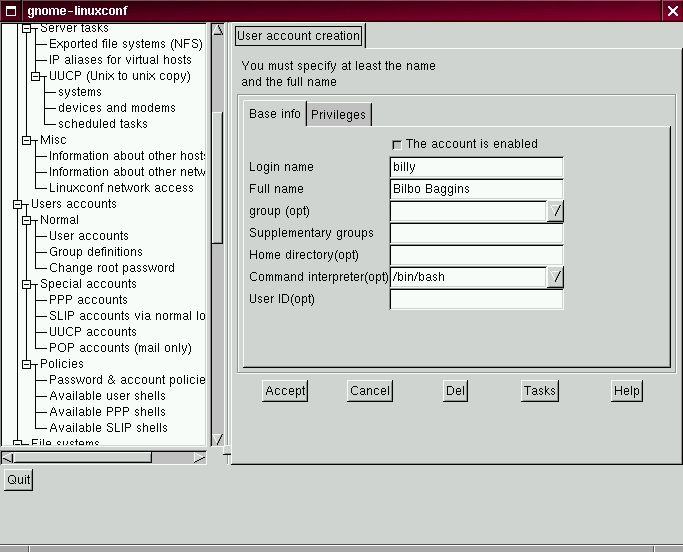
Toward the bottom of the right panel, click on the Add button, between the Quit and Help buttons. Now, we'll see a dialog called User account creation. In here, we're going to fill in: Login name; Full name and group. Make sure the button is indented next to the statement The account is enabled. Now, let's type in a login name. It should be easy to remember (it's the password that should be complex, but more about that later …). Then, you can type in your full name.
When you're finished, your entries should look like the following:
Now, just click on the button marked Accept. We're almost finished. Next, we've got to come up with a password. Passwords are one of the best methods to safeguard against prying eyes or malicious behavior. If you've got a secure password, which only you know, you've taken a big step in your system's security.
For both your root and user account, your passwords should be unique and easy enough for you to remember. (Passwords can't protect very well if they're jotted down on a piece of paper and taped to the monitor!) What's both unique and easy to remember? Sometimes, passwords which contain both numbers and letters. Here's an example:
Once you decide on a password you think you'll remember, type it in the box provided. You won't see the password, except in a series of asterisks (as shown in figure Figure 2-10). Then, click on the Accept button. You'll be asked to retype the password for verification. Again, you won't see your password as you type it. When you've finished, you'll see the account listed in the accounts panel (see Figure 2-11 for an example). That's all there is to it.
For additional security, you should change your passwords every now and then. From your user account, you can change your password by clicking on the account name, then clicking on the box marked Passwd at the bottom.
To learn more about how to modify your account or perform other account procedures, turn to the System Configuration chapter in the Official Red Hat Linux Reference Guide. From the shell prompt: At the prompt, type useradd billy:
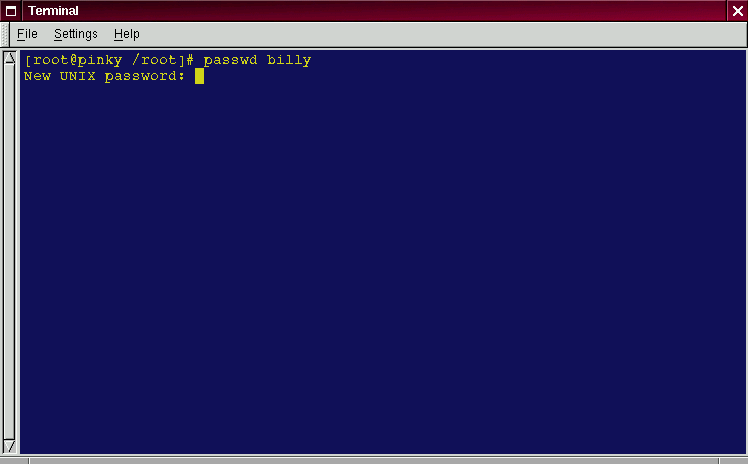
Looks like nothing's changed, right? Wrong. Although you've got the same prompt, an entry has already been made for the new account. Now, it's time to specify a password. At the prompt, type passwd billy. It should look like this:
Remember that the password should be easy to recall and a unique mixture of letters, symbols and/or numbers. That's it.
From now on, whenever you want to add a user, change account information or change account passwords -- including the root password -- either useradd or Linuxconf will fit the bill. Make sure you're logged in as the root user, however.
Regardless of the method you choose -- from the shell prompt or from Linuxconf -- your new user account's "login directory" will be placed in a subdirectory of /home. To finish up and try out your new account, log out from your root account. You'll be taken back to the login screen. Now, you can log in to your new user account.
|
|
|||||||||||