
 Download
 Online Shop
 Red Hat Network
|
|
|
Download
Online Shop
Red Hat Network
|
|
|
||
|
||
|
|
| Red Hat Documentation |
 |
Chapter 1. Getting StartedLike many new users, learning how to work on your Red Hat Linux system can be both exciting and a little unnerving. To begin your journey, you'll have to log in. When you log in, you're basically "introducing yourself" to the system.
When you installed Red Hat Linux, you had the opportunity to install the X Window System -- also simply called X -- which is the graphical environment. You were also asked whether you wanted to use a graphical screen, rather than a console to log in. Although our emphasis throughout this book will be on navigation and productivity using X, we'll cover both the graphical and console methods of logging in and starting the X Window System. Log In, PleaseUnlike some other operating systems, your Red Hat Linux system uses accounts to manage privileges, maintain security and more. Not all accounts are created equal: some have fewer rights to access files or services than others. If you've already created a user account, you can skip ahead to Chapter 2. If you created only the root account, read on to learn how to set up a user account.
Create a User AccountWhen you installed Red Hat Linux, you were asked to create a root password -- that is, a password for the root account, the system administrator. At that time, you were also able to create additional user accounts, which allow you to accomplish most tasks, without potentially harming your system -- as would be the case if you were to use your root account for everything. If you didn't create a user account during the installation, that's your first task. Here's what you'll do:
Logging In As RootRegardless of whether you've chosen a graphical or console login screen, you'll have to supply a login account name and the password associated with that account. From a console screen, for example, you'll see something like:
Unless you've chosen to give your machine a name, as in a network setting, your machine will probably be called localhost. To log in to the root account, at the login and password prompts, type root and the root password you chose when you installed Red Hat Linux. If you're using the graphical login screen, similar to Figure 1-1, just type root in the box, press Enter and type in the password you created for the root account. If you still see your console screen (instead of the graphical desktop) you can start the X Window System by typing startx as follows:
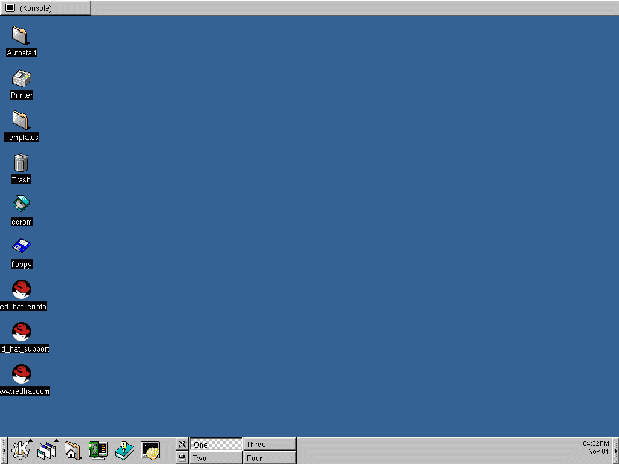
Once you start the X Window System, you'll find a desktop similar to Figure 1-2 in GNOME or Figure 1-3 in KDE. Starting an XtermBoth GNOME and KDE offer quick launch buttons on their panels to open an Xterm window. On the GNOME Panel, the button which
launches an Xterm appears near the center and looks like: You can also find launchers to Xterms from the GNOME menu, under Utilities. Items which will open Xterms include GNOME terminal, Regular XTerm, and Color XTerm. Similar to GNOME, the KDE Panel prominently
features a quick launch button for an Xterm. The launcher looks like:
You can also find the launcher from the KDE main menu under Utilities=>Konsole. Now, click on the Xterm button to open a window. You'll see the shell prompt inside the window, which will look like
Type useradd, then a space and the name of the new user account (name the account newuser, for example). It may not appear that anything has happened, but you've just completed step one of creating the new account. All that remains is for you to give this account a password.
Now, on the next line, type passwd, a space and type the name of the new account for which you want to create the password (passwd newuser).
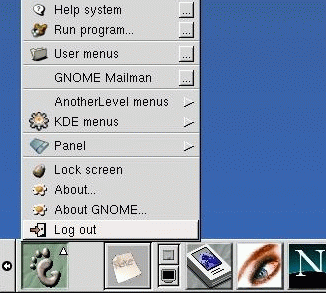
Next, you'll be asked to enter the password for the new user's account -- the prompt will state: New UNIX password. Enter a password that will be easy to remember and secure. Type the password again for confirmation, and you'll see a message stating passwd: all authentication tokens updated successfully, which means that you've successfully created the new account. In Figure 1-6, you can see a sample of an Xterm window with the commands and prompts. You can exit from the Xterm by clicking the X button on the upper right of the window, or by typing exit at the prompt. Logging Out of RootNow, you should log out of the root account and log in to your user account. To log out from GNOME, click once on the Main Menu Button on the Panel and drag your mouse cursor to the first item, labeled Log out (as in Figure 1-7). When the confirmation dialog appears (see Figure 1-8), select the Logout option and click the Yes button. If you want to save the configuration of your Panel, as well as any programs which are running, check the Save current setup option, as well. Similarly, in KDE, you can log out from the menu button on the Panel (see Figure 1-9). By default, the Panel in KDE also contains
a quick launch button to log out; it's located near the
Taskbar, at the center of the
Panel, and looks like: You'll either return to the graphical login screen or the shell prompt, depending on how you chose to log in. If you're returned to a non-graphical console prompt, just type exit at the prompt, as in:
Now, you can log into your user account the same way you logged in as root. |
|
|
|
|
|