
 Download
 Online Shop
 Red Hat Network
|
|
|
Download
Online Shop
Red Hat Network
|
|
|
||
|
||
|
|
| Red Hat Documentation |
 |
Chapter 11. An Introduction to LinuxconfCreating a New Account in LinuxconfOne of the most powerful tools you can use for system administration is Linuxconf. You can use Linuxconf for adding and manipulating accounts, monitoring system activities, controlling the way your system starts, and more. Here, we'll create a user account with Linuxconf to serve as a brief introduction to the tool. For a more detailed look at the application's features -- including greater depth on working with accounts -- turn to its chapter in the system configuration section of the Official Red Hat Linux Reference Guide, on the Documentation CD. Creating user accounts for yourself or others is a pretty simple process from Linuxconf, which allows you to tailor many aspects of the account. Login as root to use Linuxconf. You can either login as root or become root in your user account. To accomplish the latter, open an Xterm and type su, then your root password. Once you're root, type linuxconf to begin.
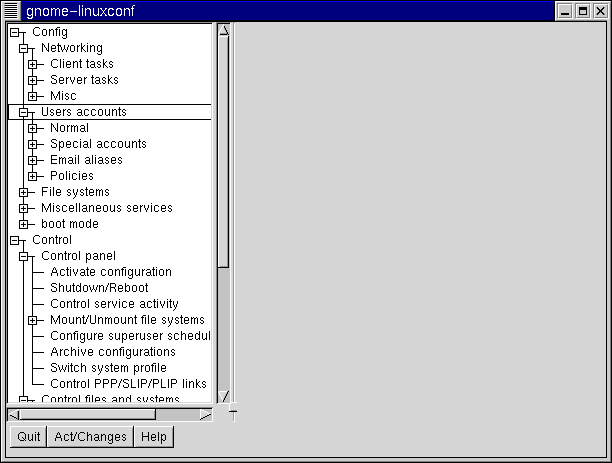
We want to add an account, so scroll about a third of the way down the menu in the left panel, to the entry marked Users accounts. If the entry has a "+" next to it, go ahead and click on the "+".
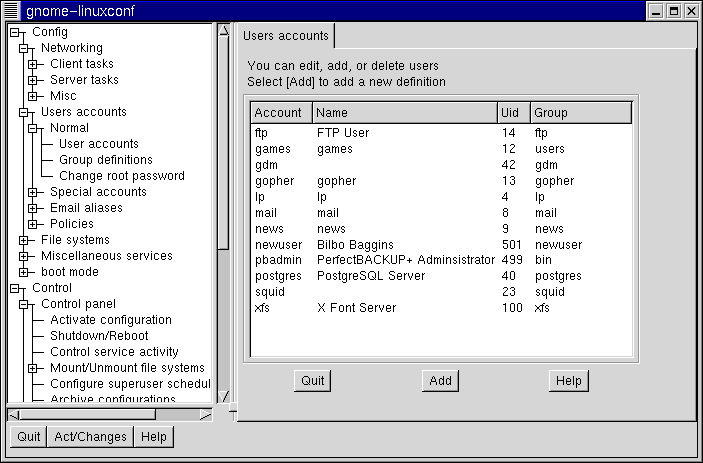
Now, the menu will expand to show entries in the Users accounts listing. The sub-entries will look like Figure 11-2. Left-click with your mouse button on the User accounts entry, under Normal. In the right panel, you'll now see a box of the current user accounts (as shown in Figure 11-2).
Toward the bottom of the right panel, click on the Add button, between the Quit and Help buttons. Now, we'll see a dialog called User account creation. In here, we're going to fill in: Login name; Full name and group. Make sure the button is indented next to the statement The account is enabled. Next, type in a login name. It should be easy to remember (it's the password that should be complex, but more about that later …). Then, you can type in your full name.
When you're finished, your entries should look like Figure 11-2. Now, just click on the button marked Accept. We're almost finished. Next, we've got to come up with a password. Passwords are one of the best methods to safeguard against prying eyes or malicious behavior. If you use a secure password, which only you know, you've taken an important step towards keeping your system secure.
For both your root and user account, your passwords should be unique and easy enough for you to remember. (Passwords can't protect very well if they're jotted down on a piece of paper and taped to the monitor!) What's both unique and easy to remember? Sometimes, passwords which contain both numbers and letters. Here's an example:
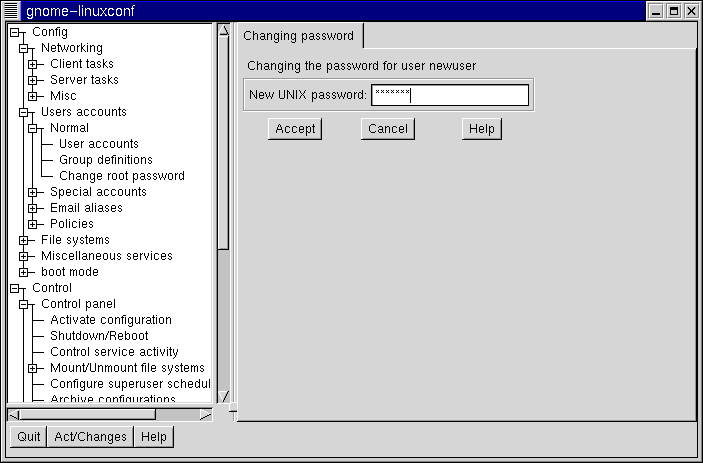
Once you decide on a password you think you'll remember, type it in the box provided. You won't see the password, except in a series of asterisks (as shown in figure Figure 11-4). Then, click on the Accept button. You'll be asked to retype the password for verification. Again, you won't see your password as you type it. When you've finished, you'll see the account listed in the accounts panel (see Figure 11-5 for an example). That's all there is to it.
For additional security, you should change your passwords every now and then. From your user account, you can change your password by clicking on the account name, then clicking on the box marked Passwd at the bottom.
To learn more about how to modify your account or perform other account procedures, turn to the System Configuration chapter in the Official Red Hat Linux Reference Guide on the Documentation CD. |
|
|
|
|
|