
 Download
 Online Shop
 Red Hat Network
|
|
|
Download
Online Shop
Red Hat Network
|
|
|
||
|
||
|
|
| Red Hat Documentation |
 |
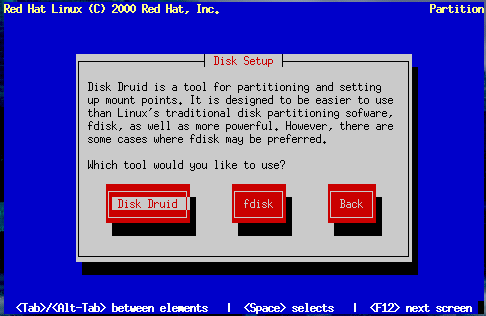
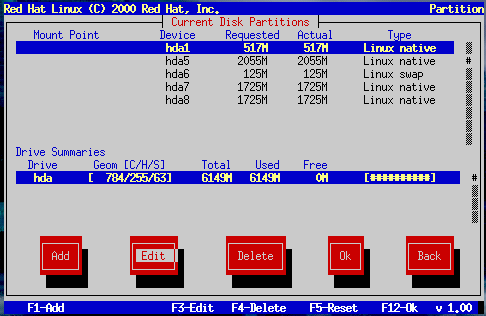
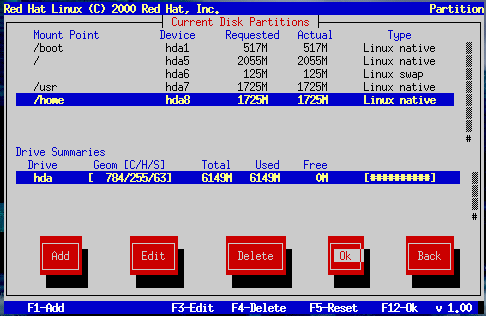
Partitioning Your Disk for Red Hat LinuxIf you have not yet planned how you will set up your partitions, turn to Appendix B. There you'll find an introduction to basic disk partitioning concepts. As a bare minimum, you'll need an appropriately-sized root partition, and a swap partition of at least 16 MB. Figure 10-14 shows the two disk partitioning applications that are available for you to use. If you will be using fdisk to partition your drive, please see the section called Using fdisk for those instructions. If you select Disk Druid, continue reading below. The following sections describe the layout of Figure 10-15 and how to use its buttons to set up partitions. If you're already familiar with Disk Druid, you can partition your disk and skip to the section called Choose Partitions to Format Dialog. You use the disk partitioning dialogs to tell the installation program where to install Red Hat Linux (Figure 10-15). The Current Disk Partitions SectionEach line in the Current Disk Partitions section represents a disk partition. In this example (Figure 10-15), there are Linux existing partitions. Note the scroll bar to the right, which indicates that there may be more partitions than can be displayed at one time. If you use the Up and Down arrow keys, you can see if there are any additional partitions. Each line in this section has five different fields:
As you scroll through the Current Disk Partitions section, you might see an Unallocated Requested Partitions title bar, followed by one or more partitions. These are partitions that have been requested but, for one reason or another, have not been allocated. A common reason for having an unallocated partition is a lack of sufficient free space for the partition. In any case, the reason the partition remains unallocated will be displayed after the partition's mount point. The Drive Summaries SectionEach line in the Drive Summaries section represents a hard disk on your system. Each line has the following fields:
Disk Druid's ButtonsThese buttons control Disk Druid's actions. They are used to add and delete partitions, and to change partition attributes. In addition, there are buttons that are used to accept the changes you've made, or to exit Disk Druid entirely. Let's take a look at each button in order.
Handy Function KeysUse the F5 (Reset) function key to discard all changes you may have made while in Disk Druid, and return the list of partitions to those read from the partition table(s) on your hard disk(s). When selected, you'll be asked to confirm whether you want to discard the changes. Note that any mount points you've specified will be lost, and will need to be reentered.
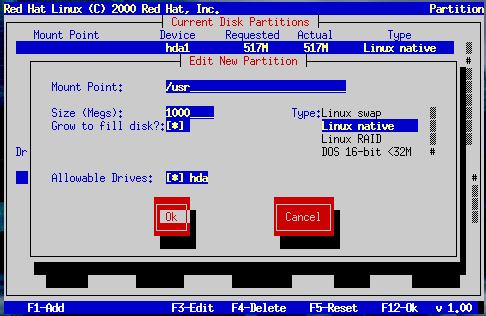
Adding a PartitionTo add a new partition, select the Add button and press Space or Enter. The Edit New Partition dialog (Figure 10-16) appears. The screen contains the following fields:
Problems When Adding a Partition
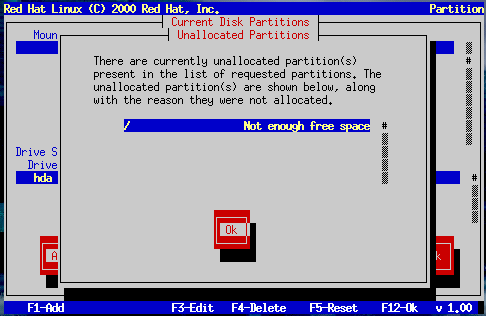
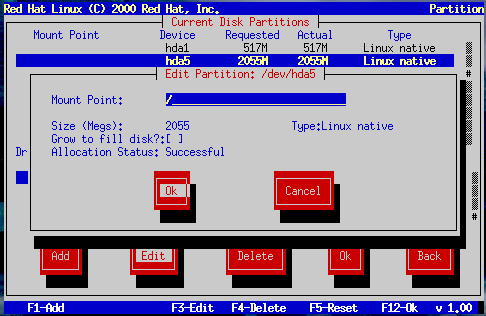
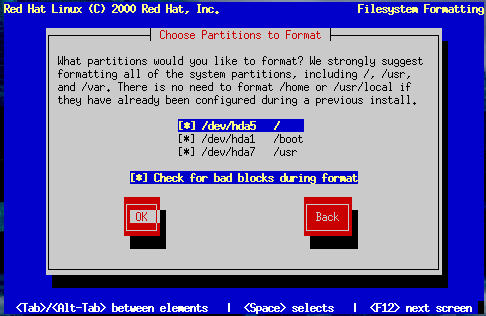
If you attempt to add a partition and Disk Druid can't carry out your request, you'll see a dialog box listing any partitions that are currently unallocated, along with the reason they could not be allocated, as in Figure 10-17. Select the OK button, and press Space to continue. Note that the unallocated partition(s) are also displayed on Disk Druid's main screen (though you may have to scroll the Current Disk Partitions section to see them). Editing a PartitionTo change a partition's mount point, highlight the partition in the Current Disk Partitions section, select the Edit button, and press Space. The Edit Partition dialog is similar to the one shown in Figure 10-16. The difference here is that all fields except the mount point are read-only. To modify any other value, delete the partition and add it again with the new values. Deleting a PartitionTo delete a partition, highlight the partition in the Current Disk Partitions section, select the Delete button, and press Space. You will be asked to confirm the deletion. When You're FinishedOnce you've configured your partitions and entered your mount points, you screen should look something like Figure 10-19. Choose Partitions to Format DialogNext, select which partitions you want to format (Figure 10-20). You must format all newly created partitions and other partitions that contain old data (assuming they don't contain data you wish to keep).
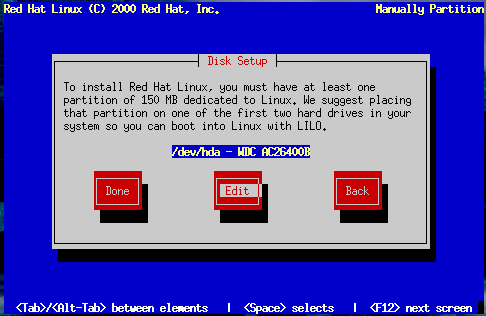
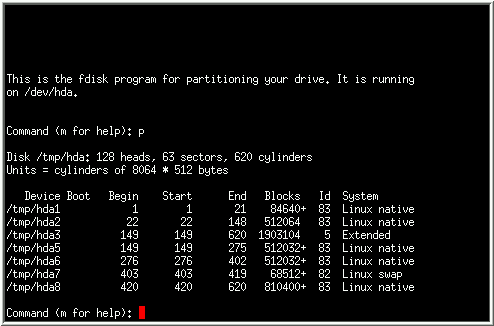
When you have selected the partitions to format, press Space. If you wish to check for bad blocks while formatting each filesystem (recommended for those with older disk drives), select Check for bad blocks during format. Select OK, and press Space. Using fdiskIf you chose a custom-class installation, you also chose which disk partitioning application to use. This section only applies if you opted to use fdisk. Once you've selected fdisk, you'll be presented with the Partition Disks dialog box (Figure 10-21). In this box is a list of every disk on your computer. Using Tab, and the Up and Down arrow keys, highlight the disk you'd like to partition, select Edit, and press Space. You will then enter fdisk and can partition the disk you selected. Repeat this process for each disk you want to partition. When you're finished, select Done. An Overview of fdiskfdisk includes online help which is terse but useful. Here are a few tips:
Changing the Partition TableWhen you are finished partitioning your disks, press Done; you may see a message indicating that the installation program needs to reboot. This is a normal occurrence after changing a disk's partition data; it usually happens if you created, changed or deleted any extended partitions. After you press OK, your machine will reboot and the installation will begin again. Repeat the same installation steps you performed earlier until you reach the Partition Disks dialog; then simply choose Done. | ||||||||||||||||||||||||||
|
|
|
|
|