If you purchase your certificate from a well-known CA, you probably
won't need to modify your browser to accept the certificate, since many
browsers are configured to accept well-known CA's signed certificates.
However, this depends upon each browser's configuration.
Purchasing a certificate from VeriSign is similar to requesting the
free test certificate. Point your browser to http://digitalid.verisign.com/server/enrollIntro.htm.
You get a choice between using their Wizard and using their Standard
certificate request process. We'll go through the Standard process,
so start by clicking on the Standard button.
Read the information provided. You'll probably want to print out
a copy of their Step by Step Guide as suggested. Click on the
Continue button at the bottom of the page.
The next page is entitled Confirm Domain Name
and is shown as figure Figure 3-7. You
need a valid, registered domain name in order to obtain a
certificate. This page instructs you to obtain a
whois query result for your domain name. The
whois result will be used by VeriSign to
confirm that your organization actually controls the domain for
which you'll be using their certificate.
Figure 3-7. Confirming your Domain Name for VeriSign
Click on whichever link on the right is applicable to you, and use
their service to look up a whois for your
domain name. Note that you'll need to look up the second level
domain name (i.e., just whatever.com instead of www.whatever.com).
Print out or save the whois query result and
use your back button to return to the VeriSign page. Click
Continue.
The next step is to "Obtain Proof of Right." This means that you
need to prove to VeriSign that your organization is legitimate.
The easiest way to do this is to provide them with your D-U-N-S
number, but there are other ways if you don't have a D-U-N-S
number or you don't want to use one. Refer to the section called Proving Your Organization's Identity to
VeriSign or to the instructions provided by
VeriSign. You'll need that proof, ready for submission to
VeriSign, before you can apply for a certificate. Once you have
the required documents, press Continue at
the bottom of the page.
The next page is entitled Generate CSR. If
you followed the instructions provided in the section called Generating a Key and the section called Generating a Certificate Request, you have already generated a
CSR. Your CSR should be saved as server.csr
in /etc/httpd/conf/ssl.csr. If you have not
generated a key and a certificate request, follow the instructions
in those two sections. Then click on the
Continue button at the bottom of this page.
On the Submit CSR page, shown as Figure 3-8, you'll see an example of a certificate
request.
Figure 3-8. Submitting a CSR to VeriSign
Paste the contents of your server.csr file
into the Enter CSR Information: text box.
Then press the Continue button at the
bottom of the page.
The next page, Complete Application, contains
an application for you to fill out. The top section
(Verify Distinguished Name) will already be
completed from the contents of your certificate request. Scroll
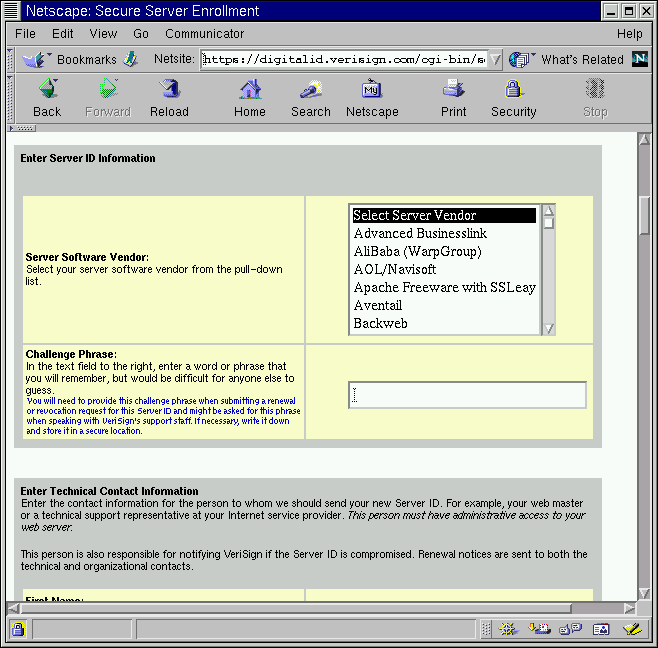
down to the next section, Enter Server ID
Information as shown in Figure 3-9.
Figure 3-9. Completing the VeriSign Application
Select Apache Freeware with SSLeay from the Select
Server Vendor scroll-down box.
Type a "challenge phrase" into the area provided. You may be
asked for your challenge phrase if you ever need support from
VeriSign, so be sure to record it and keep it someplace safe.
Fill in the Enter Technical Contact
Information section with information about your
Red Hat Linux Apache/SSL Server's administrator or webmaster.
Fill in the Enter Organizational Contact
Information section with information about your
Red Hat Linux Apache/SSL Server's administrator or webmaster, or whoever you
feel is appropriate according to the instructions provided by
VeriSign.
Fill in the Enter Billing Contact Information
with information for the person who will be contacted for billing
purposes.
Select whether this is your first VeriSign certificate or not. You
get a discounted price if you already have at least one. Choose
which VeriSign you want.
Indicate how you are going to pay for your certificate.
Fill in your D-U-N-S number. If you don't have one, you can apply
for one at this point. If you are going to use other documents to
prove your organization's legitimacy, you'll need to fax or mail
them to VeriSign after you submit your enrollment form.
After you've read their server agreement, click on the
Continue button at the bottom of the page.
Your application will be submitted.
After you've successfully completed your enrollment form and your
information and payment has been provided to VeriSign, they will
authenticate your organization's identity and issue your certificate.
When your application has been approved, they will send your
certificate by email to the technical and organizational contacts you
provided.
The next step they describe is to generate a key and a certificate
signing request (CSR). If you followed the instructions contained
in section the section called Generating a Key and the section called Generating a Certificate Request, you already have a key
(server.key) and a CSR
(server.csr). If you did not already create
your key and certificate request, do so now.
Go to Thawte's Buy an Organizational
Certificate Web page at https://www.thawte.com/cgi/server/step1.exe.
Select Web Server Certificate. Click on
the Next button at the bottom of the page.
The next page, Server Cert Enrollment, is
shown as figure Figure 3-10. Paste the
contents of your server.csr file into the
Server Certificate Signing Request (CSR) text
box.
Figure 3-10. Thawte Enrollment Form
Choose Apache+mod_ssl from the
Web Server Software pull-down menu.
Choose how you want to pay for the certificate.
Since Red Hat is a Hosting Partner with Thawte, you will receive $25
off the certificate price, so make sure you type in
redhat to the Hosting Partner
Code box. This is all you need to do in order to get
the discount on a Thawte certificate.
Click on Next at the bottom of the page.
The next page, also entitled Server Cert
Enrollment contains the form you need to fill out and
is shown as figure Figure 3-11.
Figure 3-11. Thawte Application
Under Background Information select a
description for your organization from the pull-down menu, or type
your own description into the text box provided.
If you have a D-U-N-S number, type it into the text box under
"DUNS Number."
Under "Technical Contact/Webmaster," fill in contact information for
your Red Hat Linux Apache/SSL Server's administrator or your webmaster.
Click on the Next button at the bottom of
the page.
The next page, also entitled Server Cert
Enrollment, is the last page of their enrollment form
and is shown as figure Figure 3-12. From
the first pull-down menu, choose the currency in which you are
going to pay Thawte.
Figure 3-12. Thawte Application
Type the street address for your organization into the
Office Street Address text box.
Type in your organization's fax number into the text box under
"Office Fax Number."
From the pull-down menu under "Nearest Thawte
Office," choose the Thawte office closest to your
organization.
If you want to, you may type a password or challenge phrase into
the text box under "Privacy Protection
Password." After you've submitted your application,
you'll be able to check on its status on the Web. If you type a
password in here, then only people who know the password will be
able to check on the status of your application. If you don't
fill one in, anyone can check on your application.
Click on Next at the bottom of the page.
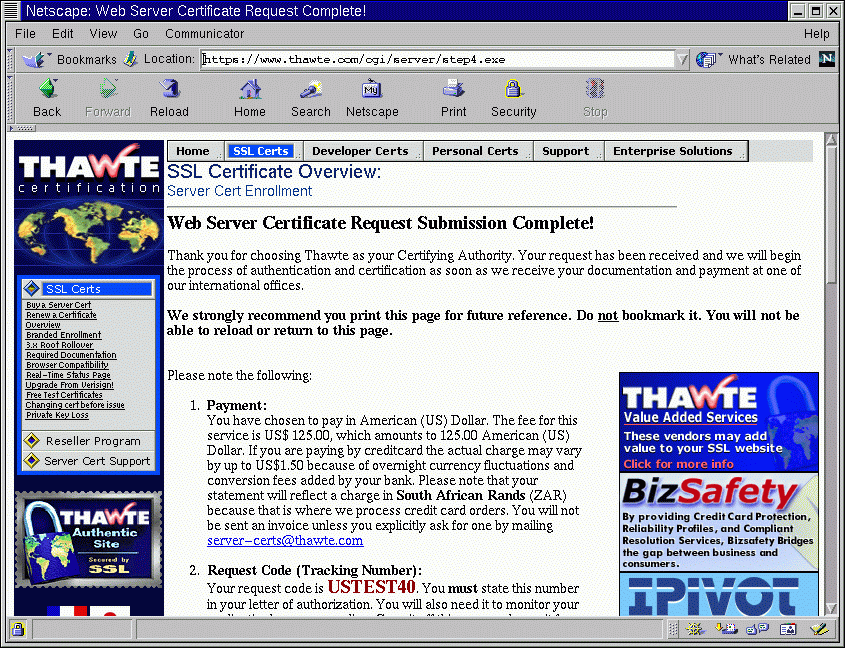
The next page will indicate that your submission is complete, as
shown in figure Figure 3-13. This page
provides you with a tracking number for your application, so that
you can monitor its status over the Web. This page also gives you
contact information for Thawte and instructions on where to send
your documentation (as described in the section called Proving Your Organization's Identity to Thawte) and your payment. You should print
this page for future reference.
Figure 3-13. Thawte Submission Complete
After Thawte receives your documentation and payment, your
certificate should be issued by e-mail within five working days.



 Download