| Red Hat Documentation |
 |
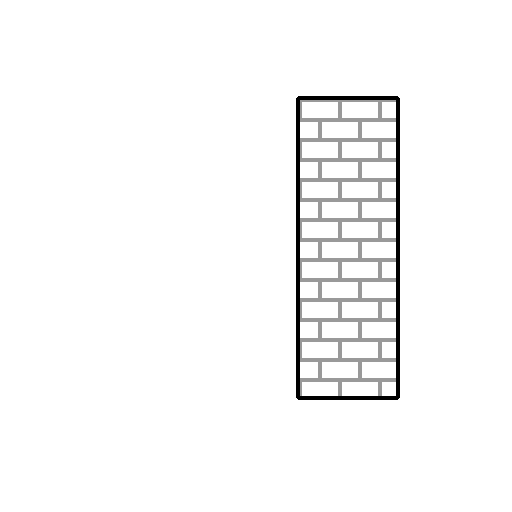
Appendix C. An Introduction to Disk PartitionsDisk partitions are a standard part of the personal computer landscape, and have been for quite some time. However, with so many people purchasing computers featuring preinstalled operating systems, relatively few people understand how partitions work. This chapter attempts to explain how disk partitions work so you'll find your Red Hat Linux installation is as simple as possible. If you're reasonably comfortable with disk partitions, you could skip ahead to the section called Making Room For Red Hat Linux for more information on the process of freeing up disk space to prepare for a Red Hat Linux installation. This section also discusses the partition naming scheme used by Linux systems, sharing disk space with other operating systems, and related topics. Hard Disk Basic ConceptsHard disks perform a very simple function -- they store data and reliably retrieve it on command. When discussing issues such as disk partitioning, it's important to know a bit about the underlying hardware; unfortunately, it's easy to become bogged down in details. Therefore, let's use a simplified diagram of a disk drive to help us explain what goes on "under the hood." Figure C-1 shows a brand-new, unused disk drive. Not much to look at, is it? But if we're talking about disk drives on a basic level, it will do. Let's say that we'd like to store some data on this drive. As things stand now, it won't work. There's something we need to do first… It's Not What You Write, it's How You Write ItThe old-timers in the audience probably got this one of the first try. We need to format the drive. Formatting (usually known as "making a filesystem" in Linux parlance) writes information to the drive, creating order out of the empty space in an unformatted drive. As Figure C-2 implies, the order imposed by a filesystem involves some tradeoffs:
Given that filesystems make things like directories and files possible, these tradeoffs are usually seen as a small price to pay. It's also worth noting that there is no single, universal filesystem; as Figure C-3 shows, a disk drive may have one of many different filesystems written on it. As you might guess, different filesystems tend to be incompatible; that is, an operating system that supports one filesystem (or a handful of related filesystem types) may not support another. This last statement is not a hard-and-fast rule, however. For example, Red Hat Linux supports a wide variety of filesystems (including many commonly used by other operating systems), making data interchange easy. Of course, writing a filesystem to disk is only the beginning. The goal of this process is to actually store and retrieve data. Let's take a look at our drive after some files have been written to it. As Figure C-4 shows, 14 of the previously-empty inodes are now holding data. We cannot determine how many files reside on this drive; it may be as few as one or as many as 14, as all files use as least one inode. Another important point to note is that the used inodes do not have to form a contiguous region; used and unused inodes may be interspersed. This is known as fragmentation. Fragmentation can play a part when attempting to resize an existing partition. As with most computer-related technologies, disk drives continued to change over time. In particular, they changed in one specific way -- they got bigger. Not bigger in size, but bigger in capacity. And it was this additional capacity that drove a change in the way disk drives were used. Partitions -- Turning One Drive Into ManyAs disk drive capacities soared, some people started wondering if having all that space in one big chunk wasn't such a great idea. This line of thinking was driven by several issues, some philosophical, some technical. On the philosophical side, above a certain size, it seemed that the additional space provided by a larger drive created more clutter. On the technical side, some filesystems were never designed to support larger drives. Or the filesystems could support larger drives, but the overhead imposed by the filesystem became excessive. The solution to this problem was to divide disks into partitions. Each partition can be accessed as if it was a separate disk. This is done through the addition of a partition table.
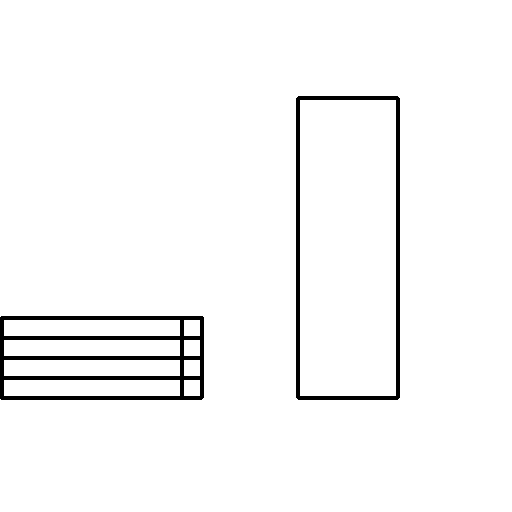
As Figure C-5 shows, the partition table is divided into four sections. Each section can hold the information necessary to define a single partition, meaning that the partition table can define no more than four partitions. Each partition table entry contains several important characteristics of the partition:
Let's take a closer look at each of these characteristics. The starting and ending points actually define the partition's size and location on the disk. The "active" flag is used by some operating systems' boot loaders. In other words, the operating system in the partition that is marked "active" will be booted. The partition's type can be a bit confusing. The type is a number that identifies the partition's anticipated usage. If that statement sounds a bit vague, that's because the meaning of the partition type is a bit vague. Some operating systems use the partition type to denote a specific filesystem type, to flag the partition as being associated with a particular operating system, to indicate that the partition contains a bootable operating system, or some combination of the three. Table C-1 contains a listing of some popular (and obscure) partition types, along with their numeric values. Table C-1. Partition types
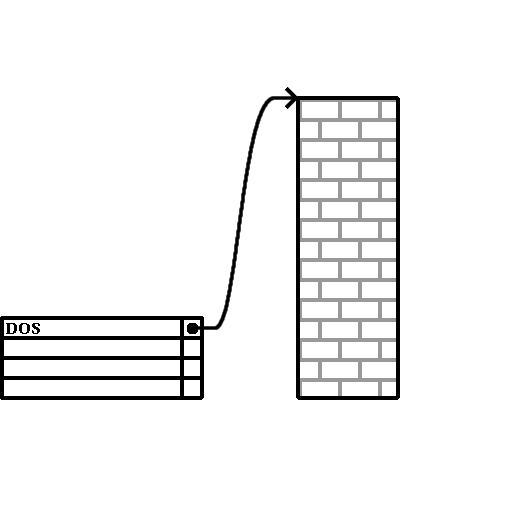
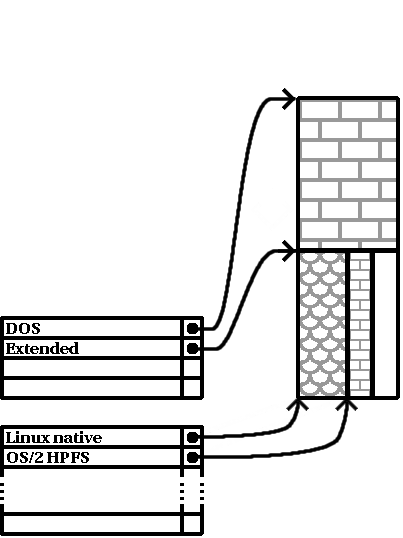
Now you might be wondering how all this additional complexity is normally used. See Figure C-6 for an example. That's right -- in many cases there is but a single partition spanning the entire disk, essentially duplicating the pre-partitioned days of yore. The partition table has only one entry used, and it points to the start of the partition. We've labeled this partition as being of type "DOS," although as you can see from Table C-1, that's a bit simplistic, but adequate for the purposes of this discussion. This is a typical partition layout for most newly purchased computers with some version of Windows pre-installed. Paritions within Partitions -- An Overview of Extended PartitionsOf course, in time it became obvious that four partitions would not be enough. As disk drives continued to grow, it became more and more likely that a person could configure four reasonably-sized partitions and still have disk space left over. There needed to be some way of creating more partitions. Enter the extended partition. As you may have noticed in Table C-1, there is an "Extended" partition type; it is this partition type that is at the heart of extended partitions. Here's how it works. When a partition is created and its type is set to "Extended," an extended partition table is created. In essence, the extended partition is like a disk drive in its own right -- it has a partition table that points to one or more partitions (now called logical partitions, as opposed to the four primary partitions) contained entirely within the extended partition itself. Figure C-7 shows a disk drive with one primary partition, and one extended partition containing two logical partitions (along with some unpartitioned free space). As this figure implies, there is a difference between primary and logical partitions -- there can only be four primary partitions, but there is no fixed limit to the number of logical partitions that can exist. (However, in reality it is probably not a good idea to try to define and use more than 12 logical partitions on a single disk drive.) Now that we've discussed partitions in general, let's see how to use this knowledge to get Red Hat Linux installed. Making Room For Red Hat LinuxThere are three possible scenarios you may face when attempting to repartition your hard disk:
Let's look at each scenario in order.
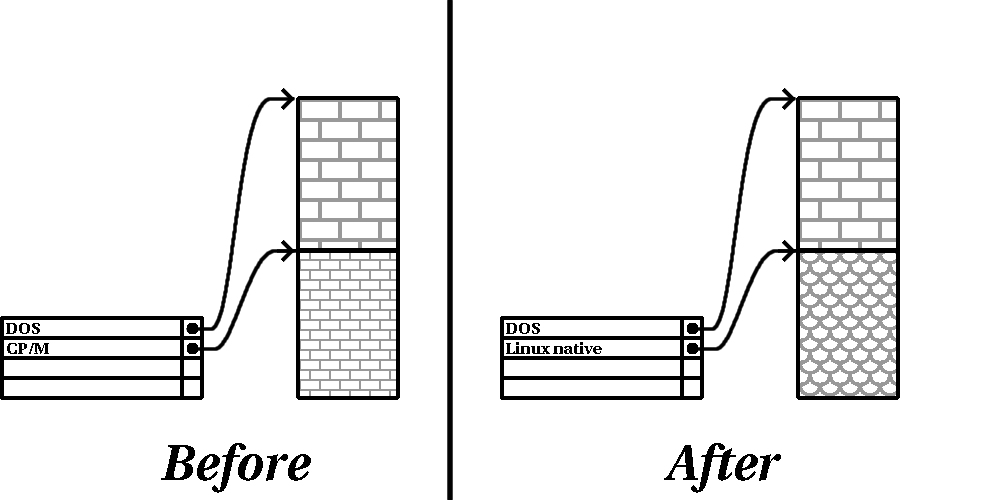
Using Unpartitioned Free SpaceIn this situation, the partitions already defined do not span the entire hard disk, leaving unallocated space that is not part of any defined partition. Figure C-8 shows what this might look like. If you think about it, an unused hard disk also falls into this category; the only difference is that all the space is not part of any defined partition. In any case, you can simply create the necessary partitions from the unused space. Unfortunately, this scenario, although very simple, is not very likely (unless you've just purchased a new disk just for Red Hat Linux). Let's move on to a slightly more common situation. Using Space From An Unused PartitionIn this case, maybe you have one or more partitions that you just don't use any longer. Perhaps you've dabbled with another operating system in the past, and the partition(s) you've dedicated to it never seem to be used anymore. Figure C-9 illustrates such a situation. If you find yourself in this situation, you can use the space allocated to the unused partition. You'll first need to delete the partition, and then create the appropriate Linux partition(s) in its place. You can either delete the partition using DOS fdisk, or you'll be given the opportunity to do so during a custom-class installation. Using Free Space From An Active PartitionThis is the most common situation. It is also, unfortunately, the hardest to work with. The main problem is that, even if you have enough free space, it's presently allocated to a partition that is in use. If you purchased a computer with pre-installed software, the hard disk most likely has one massive partition holding the operating system and data. Aside from adding a new hard drive to your system, you have two choices:
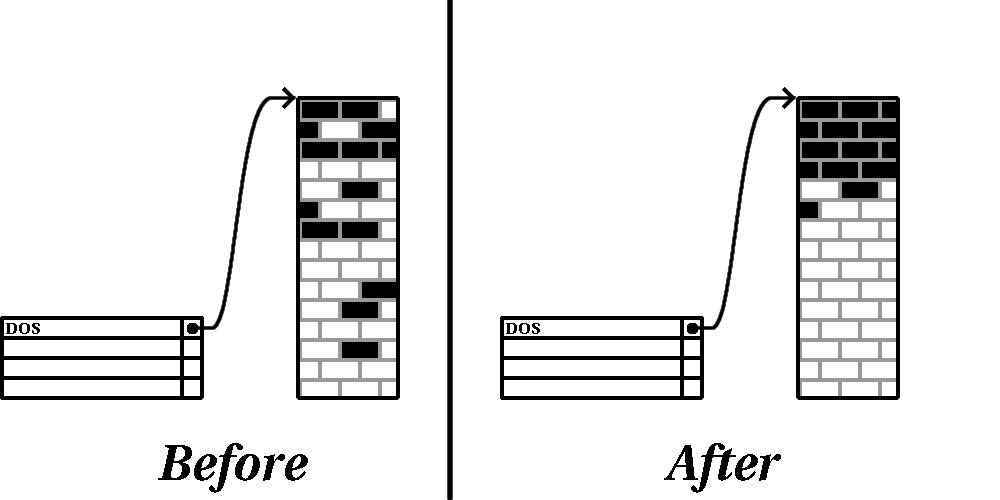
Let's take a look at each step in a bit more detail. Compress existing dataAs Figure C-11 shows, the first step is to compress the data in your existing partition. The reason for doing this is to rearrange the data such that it maximizes the available free space at the "end" of the partition. This step is crucial; without it, it is possible that the location of your data could prevent the partition from being resized to the extent desired. Note also that, for one reason or another, some data cannot be moved. If this is the case (and it restricts the size of your new partition(s)), you may be forced to destructively repartition your disk. Resize partitionFigure C-12 shows the actual resizing process. While the actual end-product of the resizing operation varies depending on the software used, in most cases the newly freed space is used to create an unformatted partition of the same type as the original partition. It's important to understand what the resizing software you use does with the newly freed space, so that you can take the appropriate steps. In the case we've illustrated, it would be best to simply delete the new DOS partition, and create the appropriate Linux partition(s). Create new partition(s)As the previous step implied, it may or may not be necessary to create new partitions. However, unless your resizing software is Linux-aware, it is likely you'll need to delete the partition that was created during the resizing process. Figure C-13 shows this being done.
As a convenience to our customers, we provide the fips utility. This is a freely available program that can resize FAT (File Allocation Table) partitions. It's included on the Red Hat Linux/Intel CD-ROM in the dosutils directory.
That said, if you decide to repartition your hard drive with fips, it is vital that you do two things:
Should you decide to use fips, be aware that after fips runs you will be left with two partitions: the one you resized, and the one fips created out of the newly freed space. If your goal is to use that space to install Red Hat Linux, you should delete the newly created partition, either by using fdisk under your current operating system, or while setting up partitions during a custom-class installation. Partition Naming SchemeLinux refers to disk partitions using a combination of letters and numbers which may be confusing, particularly if you're used to the "C drive" way of referring to hard disks and their partitions. In the DOS/Windows world, here is how partitions are named:
Red Hat Linux uses a naming scheme that is more flexible and conveys more information than the approach used by other operating systems. The naming scheme is file-based, with filenames in the form:
Here's how to decipher the partition naming scheme:
Keep this information in mind; it will make things easier to understand when you're setting up the partitions Red Hat Linux requires. Disk Partitions and Other Operating SystemsIf your Red Hat Linux partitions will be sharing a hard disk with partitions used by other operating systems, most of the time you'll have no problems. However, there are certain combinations of Linux and other operating systems that require extra care. Information on creating disk partitions compatible with other operating systems is available in several HOWTOs and Mini-HOWTOs, available on the Red Hat Linux CD in the doc/HOWTO and doc/HOWTO/mini directories. In particular, the Mini-HOWTOs whose names start with Linux+ are quite helpful.
Disk Partitions and Mount PointsOne area that many people new to Linux find confusing is the matter of how partitions are used and accessed by the Linux operating system. In DOS/Windows, it is relatively simple: If you have more than one partition, each partition gets a "drive letter." You then use the drive letter to refer to files and directories on a given partition. This is entirely different from how Red Hat Linux deals with partitions and, for that matter, with disk storage in general. The main difference is that each partition is used to form part of the storage necessary to support a single set of files and directories. This is done by associating a partition with a directory through a process known as mounting. Mounting a partition makes its storage available starting at the specified directory (known as a mount point). For example, if partition /dev/hda5 were mounted on /usr, that would mean that all files and directories under /usr would physically reside on /dev/hda5. So the file /usr/doc/FAQ/txt/Linux-FAQ would be stored on /dev/hda5, while the file /etc/X11/gdm/Sessions/Gnome would not. Continuing our example, it is also possible that one or more directories below /usr would be mount points for other partitions. For instance, a partition (say, /dev/hda7) could be mounted on /usr/local, meaning that, for example, /usr/local/man/whatis would then reside on /dev/hda7 rather than /dev/hda5. How Many Partitions?At this point in the process of preparing to install Red Hat Linux, you will need to give some consideration to the number and size of the partitions to be used by your new operating system. The question of "how many partitions" continues to spark debate within the Linux community and, without any end to the debate in sight, it's safe to say that there are probably as many partition layouts as there are people debating the issue. Keeping this in mind, we recommend that, unless you have a reason for doing otherwise, you should create the following partitions:
One Last Wrinkle: Using LILOLILO (the LInux LOader) is the most commonly used method to boot Red Hat Linux on Intel-based systems. An operating system loader, LILO operates "outside" of any operating system, using only the Basic I/O System (or BIOS) built into the computer hardware itself. This section describes LILO's interactions with PC BIOSes, and is specific to Intel-compatible computers. BIOS-Related Limitations Impacting LILOLILO is subject to some limitations imposed by the BIOS in most Intel-based computers. Specifically, most BIOSes can't access more than two hard drives and they can't access any data stored beyond cylinder 1023 of any drive. Note that some recent BIOSes do not have these limitations, but this is by no means universal. All the data LILO needs to access at boot time (including the Linux kernel) are located in the /boot directory. If you follow the partition layout recommended above, or you are performing a workstation- or server-class install, the /boot directory will be in a small, separate partition. Otherwise, it will reside in the root partition. In either case, the partition in which /boot resides must conform to the following guidelines if you are going to use LILO to boot your Red Hat Linux system:
As mentioned earlier, it is possible that some of the newer BIOSes may permit LILO to work with configurations that don't meet our guidelines. Likewise, some of LILO's more esoteric features may be used to get a Linux system started, even if the configuration doesn't meet our guidelines. However, due to the number of variables involved, Red Hat cannot support such extraordinary efforts.
Notes
|
|