| Red Hat Documentation |
 |
The Enlightenment Configuration ToolThere are two ways to launch the Enlightenment Configuration tool (E-conf). You can open the GNOME Control Center and select the Window Manager Capplet from the Desktop group. If you have Enlightenment as your current window manager you can run E-conf by pressing the Run Configuration Tool for Enlightenment button. You can also launch E-conf by clicking your middle mouse button (or both right and left mouse buttons if you have emulation) on the desktop and selecting the Enlightenment Configuration item from the pop-up menu. E-conf is divided into many sections that control various effects and functions within Enlightenment (E). You will find a list of these sections in the top left corner of the E-conf. The sections to choose from include: Basic Options, Desktops, Behavior, Audio, Special FX, Backgrounds, Themes, and Shortcuts. Basic OptionsThe Basic Options section of E-conf lets you configure how E controls the movement and focus of windows on your desktop. Each method for controlling windows has a small image to show you what they look like, but perhaps the best way to get a feel is to select one, press the Apply button and move the window around. There are three areas to configure: Move Methods, Resize Methods, and Keyboard focus follows. Figure 11-1. Enlightenment Basic Options
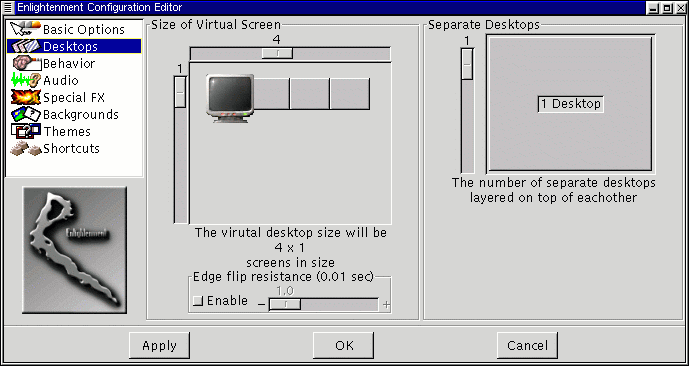
At any time you can reset all of the Enlightenment configurations to the default settings by pressing the Reset all settings to system defaults and exit button. DesktopsAs you read in the section called Desktop Areas in Chapter 13, GNOME supports the use of multiple desktop areas, and for the advanced user, multiple desktops. The control over these areas and desktops is actually handled by the window manager. The Enlightenment Configuration tool allows you to change the number of areas and desktops you have use of in your work environment. Figure 11-2. Enlightenment Desktops
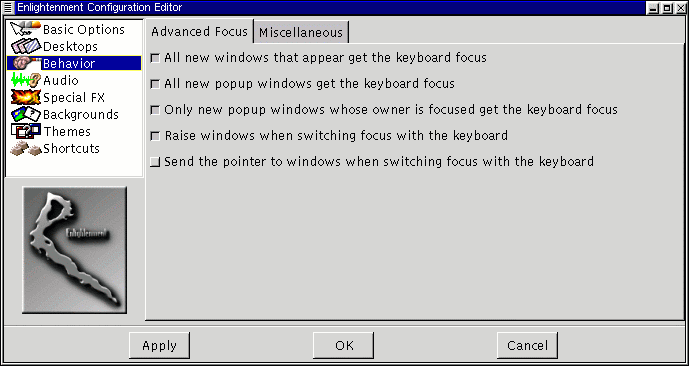
The Desktops Section of E-conf has two main tools to let you change the number of areas and desktops you use. The first tool is the Size of Virtual Screen which controls the number of desktop areas. Desktop areas are really just one big screen broken into many "virtual areas". The advantage to using virtual areas over multiple desktops is that drag and drop on the desktop will work across areas as will work being done in applications such as the GNOME File Manager. To use this tool slide the two sliders until you have the number of virtual areas, across and down, that you wish to use. The second tool is Separate Desktops, which allows you to set the number of desktops you wish to use. Unlike desktop areas these are completely separate desktops. To use this tool move the slider up or down until you have the number of desktops you wish to use. One good way to visualize your multiple areas/desktops situation is to make sure you have the GNOME Pager running. The GNOME Pager will show you how many areas and desktops you have and where your applications are within those spaces. You can also use the GNOME Pager to navigate from area to area and desktop to desktop. You can read more about the GNOME Pager in the section called GNOME Pager in Chapter 19. Edge resistance factor for auto flip - If you are using desktop areas you can choose to have the areas switch when your mouse goes past the edge of the screen in the direction of another area. If you do have this feature on you can change the resistance the mouse has when it is moving past the edge by moving the slider to the number of seconds it takes to change to the next desktop. BehaviorThe Behavior Section of E-conf allows you to control various focus and miscellaneous behaviors in E. Figure 11-3. Enlightenment Behavior
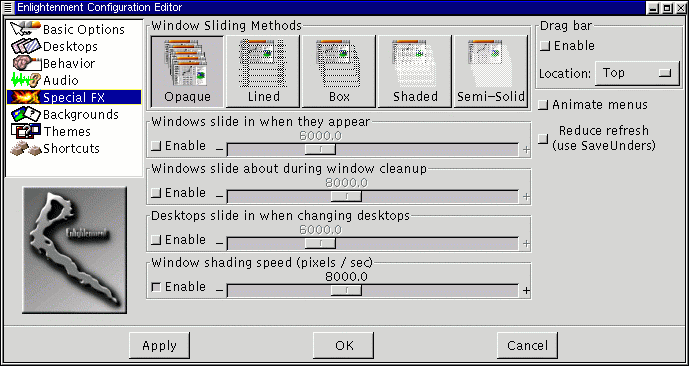
AudioYou can turn on Enlightenment's own sound events in this section. Special FXThe Special FX Section on E-conf controls various special effects that E can use to control windows. If you have a slower machine you might consider disabling these features in this section. Figure 11-4. Enlightenment Special Effects
BackgroundsYou can choose to let Enlightenment control your desktop background images. Setting the background is controlled in this area of the Enlightenment Configuration tool.
Figure 11-5. Enlightenment Backgrounds
Setting the BackgroundThe Enlightenment background selector acts as much as a file viewer for your backgrounds as it does a creator of them. You will notice first that there is a large area to preview the backgrounds. This area is not only a good place to preview your backgrounds but it acts as an area for "bookmarking" them. To set a background for your desktop you must first choose which desktop you want to set the background for. The top button which reads Desktop 0 will show you which desktop you are setting the background for. If you want to set it for another desktop you can press the button and select the proper desktop.
Once you have chosen the desktop you wish to set a background for you can select a background for that desktop. To select one simply locate the image or color in the collection on the right of the preview area or select the No background button. If you do not like the selections in your collection you can create a new one. You will find more information about making a new background in the next section.
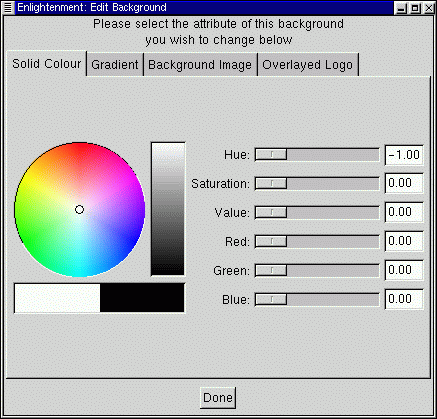
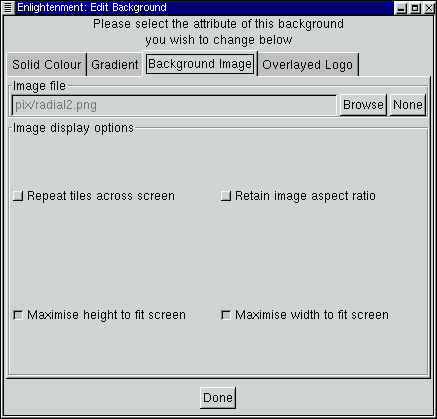
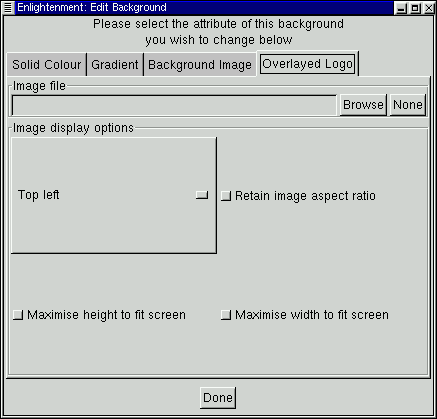
Creating a New BackgroundTo create a new background you must first press the Add new button to start adding the new background to the current collection of backgrounds on the right. This will add a new box to the collection which will be blank at first. You can start to edit the new image by selecting the new box you have just added and pressing the Edit button. This will bring up the Edit Background dialog which allows you to set the background image. The Edit Background dialog contains three tabs which represent three different types of backgrounds you can have: Solid Color, Gradient, Background Image, and Overlayed Logo. Figure 11-6. Solid Color Background
Figure 11-7. Gradient Color Background
Figure 11-8. Background Image
Figure 11-9. Overlayed Logo
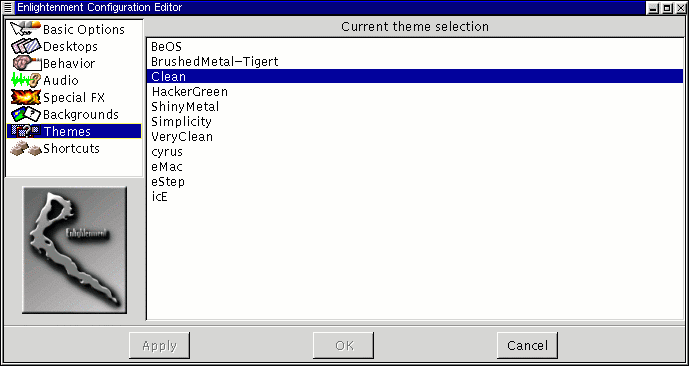
When you have completed editing your image, press the Done button to return to E-conf. ThemesEnlightenment is known for many things to the Linux community, not least of which is the sometimes fantastic and personalized look. This can be attributed to the one of the most fun features of Enlightenment, support of themes. These themes have been created by Raster and many E users throughout the world. In fact, a Web site has been set up to be a repository of E themes, http://e.themes.org. Figure 11-10. Enlightenment Themes
E themes must have an extension of .etheme to work. Some themes might be made for older version of Enlightenment and will not work with the newest release so make sure you are getting a compatible version. Once you have found a theme you would like to have for E you must put it in your
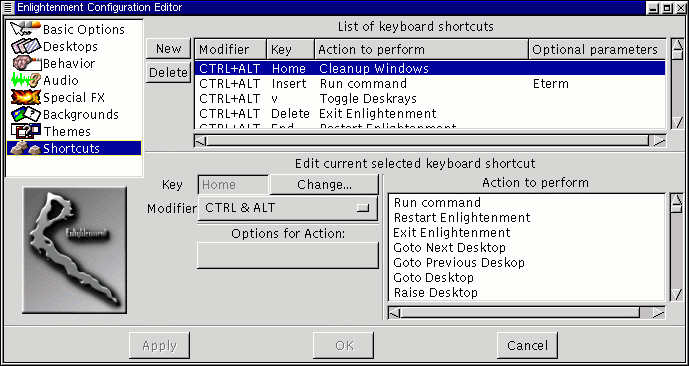
To change themes select the theme you would like in the list of available themes and press the Apply button on the bottom of the E-conf. Keyboard ShortcutsThe Keyboard Shortcuts section will allow you to change the keyboard shortcuts used for controlling windows, starting commands, and navigating between windows, areas, and desktops. Figure 11-11. Enlightenment Keyboard Shortcuts
The Keyboard Shortcuts section is divided into two main areas, List of keyboard shortcuts and the Edit current selected keyboard shortcut. In the List of keyboard shortcuts you can see which shortcuts have already been defined and select them to edit. You can also add new shortcuts by pressing the New button and delete them by pressing the Delete button. The Edit current selected keyboard shortcut area is where you actually define what the keyboard shortcut will be. To use this area, you must select the shortcut you wish to edit, or select a newly added shortcut after you press the New button. Once a shortcut has been selected you can change the keys it uses or even the function it performs. To change the keys used for a shortcut press the Modifier selection button and select which modifiers you wish to use. Modifiers are the keys ALT, CTRL, and SHIFT. You can select one modifier or a combination of modifiers to use with your shortcut. At this point you will also need to change the key being used by pressing the Change button beside the Key definition box. Once you press the Change button you will receive a short message pop-up window which will tell you to press the desired key. Press the key and the definition will be changed. To assign the new shortcut to an action simply scroll though the Action to perform list and select the action you wish to perform with this shortcut. Some keystrokes you wish to use might have an action that needs defining. For example, if you wish to use a keyboard shortcut to change to a particular desktop you can select Goto Desktop. In the Options for Action you can define which desktop you want to go to by typing in the correct number. |
|
|||||||